Mobile Options
Setting up a Mobile Option
- Hover over the Mobile Access tab and select Mobile Options.

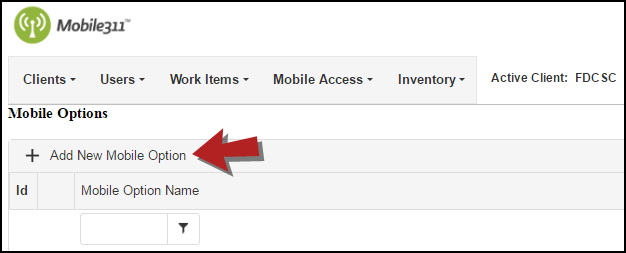
- Click on Add New Mobile Option at the top of the mobile options list.
- Enter a Mobile Options Name. Be sure to make the name descriptive enough so that you know what type of options you have selected when you are assigning the Mobile Option to users. For example: If the Mobile Option is specific to breadcrumbs, you can name it "Breadcrumbs" or "Breadcrumbs Lock". *Note: This is a required field.
Field Options
The Field Options section allows you to lock certain details on the form when entering a new work item or editing an existing work item. If any of these boxes are checked, the user will not be able to edit that field if the work item has already been saved or if the work item is newly created.

- Work Groups Locked on Edit – The Work Group originally assigned to the work item cannot be edited.
- Work Type Locked on Edit – The Work Type originally assigned to the work item cannot be edited.
- Address Locked on Edit – The Address originally selected or entered into the work item cannot be edited.
- Status Locked on Edit – The Status of the work item cannot be changed.
- Asset Id Locked on Edit – The Asset Id cannot be changed on an existing work item.
- Asset Id Locked on New – The Asset Id cannot be edited when creating a new work item.
- Comments Locked on Edit – Users will not be able to edit the Comments field on an existing work item.
- Comments Locked on New – Users will not be able to add a comment when creating a new work item.
General Options
The General Options section allows you to set various parameters that will lock different settings on the mobile app for users that are assigned to the Mobile Option.
Allows mobile devices running the Mobile311 app to collect breadcrumb information for users assigned to this Mobile Option. If this box is checked, you will need to set the collection time for the breadcrumbs from the drop down menu. It is suggested to set the collection time for 1 minute or longer to preserve the battery life on the device while the app is running. *Note: When collecting breadcrumbs, the app needs to be open and running in the foreground of the mobile device in order to collect the data. Data will not be collected if the app is running in the background or not open on the device.

Allows the mobile device to post breadcrumbs to the Mobile311 Web Portal based on the time frame you set in the drop down menu. The breadcrumb trail will be visible and searchable in the Portal for the users that have this option activated or locked on.
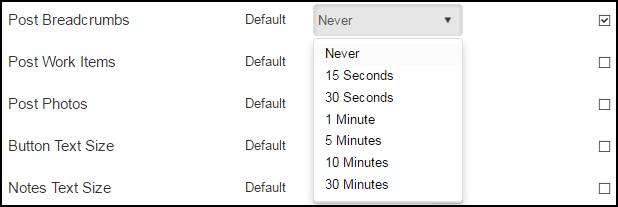
There are two lock options for posting work items:
- Immediately - As soon as a user taps the button for a Work Type in the app, a work item will be created.
- When I Hit Post - The work item will not be created until the user actually taps the Post button to save the work item.

There are two lock options for posting photos:
- Immediately - Posts the photo to a work item as soon as the user attaches it
- When I Hit Post - Posts the photo once the user taps the Post button to save the work item.

Allows you to set the size of the font on the buttons app.

Allows you to set the Notes font size in the Notes section on the work item form in the mobile app.

Allows you to set the background color on your tablet to a dark or light color.

Allows you to lock the map in the app to either a Google Map or an Esri Map (the Esri map view is what is shown in the web portal).

Allows you to set up a lock option on your mobile device to check for duplicate work items. You are also able to set up a given distance (in feet) for the duplicate check. This means the device will alert you if a duplicate work item is being created within the specified distance.

Requires the user to edit a new work item in some manner before it can be saved in the mobile app.

GPS Options
The GPS Options section allows you to set gps parameters that will lock different settings on the mobile app for users that are assigned to the Mobile Option.
If this box is checked, the location of the map in the mobile app will change based on your location.

Refers to the amount of time in milliseconds between the updates in your GPS information.

Your GPS data will update every so many meters that your mobile device travels.

Map Options
The Map Options section allows you to lock down certain items in the map on the mobile application. Most of these options can also be set within the settings of the mobile app itself at an individual user level. However, if the Web Administrator has locked the options under Mobile Options, the mobile app user will not be able to change them.
Allows you to select default work types for the user. Defaulted work types will automatically be checked in the map menu on the app.
- Click on the Select button to open the list of work types and select the ones each user will need.
- Click on the Set Default button at the bottom to save your changes.

|

|
Allows you to select statuses that will be defaulted to checked in the map menu on the mobile app.
- Click on the Select button to select the statuses you want to default for users.
- Click the Set Default button to save your changes.

|

|
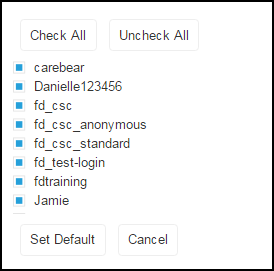
Any Logins checked here will allow the user assigned to this Mobile Option to see work items created by those Logins on the map in the mobile app.
- Click on the Select button to select the Logins you want to default to visible.
- Click the Set Default button to save your changes.

|
|
You can choose whether a user can see only work items selected in the map or view their assigned work items.

The Number of Days option designates how long work items remain visible in the list view on the app. Once a work item passes the specified Number of Days, it will no longer be visible.

Causes the map to automatically refresh every time a new work item is saved or edited.

If this box is checked, the Comments entered for a work item that is selected on the map will appear at the bottom of the screen.

Set a limit on the number of allowed comment lines by selecting a number from the drop down menu.

You can choose black or white as the Comment color that shows on the map.

Shows the latitude and longitude of your location at the bottom of the screen.

The Base Map can be defaulted to the Street Map View or the Satellite View.

Once you have selected the desired Field, General, GPS, and Map options, be sure to click the Save button at the bottom of the page.
Assigning a Mobile Option to a User
- Hover over the Users tab and select Logins.
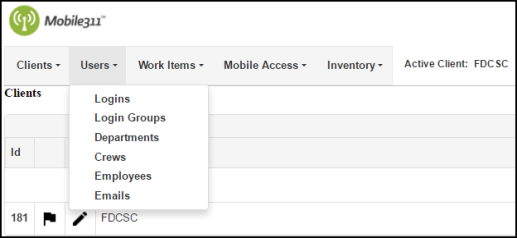
- Click the pencil icon (
 ) next to the user that needs to be assigned a Mobile Option.
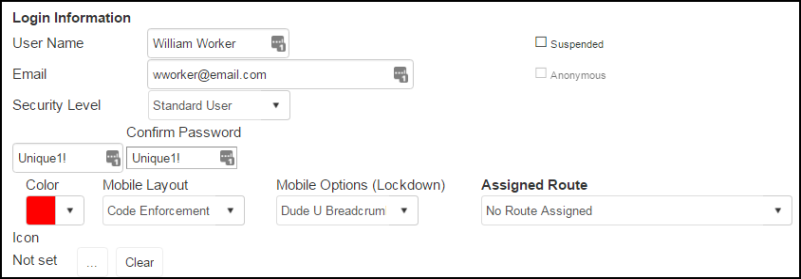
 - On the Logins Screen, locate the Mobile Options (Lockdown) drop down and select one from the list.
- Click the Save button at the bottom of the page when you are finished.
Editing a Mobile Option
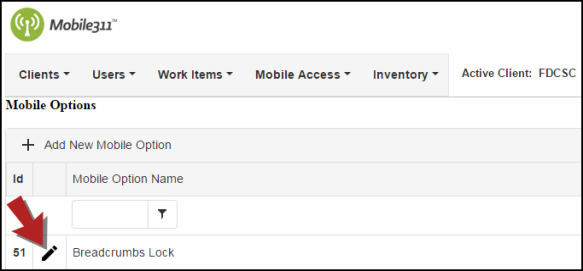
- Hover over the Mobile Access tab and click Mobile Options.
- Click the pencil icon (
 ) next to the Mobile Option that needs to be updated.
- On the next screen, make any necessary updates and click the Save button at the bottom of the page when you are finished.
Suspending a Mobile Option
If a Mobile Option no longer needs to be used, you have the option of suspending it so that it cannot be assigned to users.
- Hover over the Mobile Access tab and select Mobile Options.
- Click the pencil icon (
 ) next to the Mobile Option that needs to be suspended.
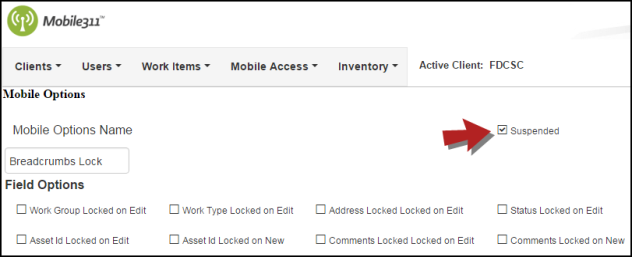
- Check the Suspended box at the top of the page.
- Click Save at the bottom of the page when you are finished.
